今回は「Slack」と「Dify」を連携させて、Slack内で使えるチャットボットを作成してみましょう。DMまたは招待されたチャンネルのメンションに反応する仕組みで、あくまでも簡易的なチャットボットの認識でお願いします。
20分程度で簡単に作れるので、AIサービスを使って何かしらの業務改善がしたい…という場合に役立ててみてください。
🕒 「生成AIお悩み相談室」30分無料相談のご案内
\今だけの特別枠、予約殺到中!/
「生成AIを導入したいけど何から始めれば?」「ChatGPTをビジネスに活用する方法は?」「コスト削減のためのAI活用法を知りたい」
このような疑問や課題をお持ちではありませんか?
当社の生成AIスペシャリストが、あなたのビジネス課題に合わせた具体的なアドバイスを完全無料で提供します。
✅ 30分で得られる価値
- 貴社の業務に最適な生成AI活用法の提案
- コスト削減・業務効率化のための具体的なステップ
- 競合他社に差をつけるAI戦略のヒント
- 内製化に向けたロードマップの相談
✅ 参加者からの声
「相談後すぐに実践できるアイデアが得られました」
「具体的な導入ステップが明確になり、迷いがなくなりました」
【完全無料・30分枠】数に限りがございますので、お早めにご予約ください。
👉 今すぐ無料相談を予約する 👈
※予約は先着順・毎月限定5枠のみ。キャンセル待ちにならないようお早めに。
Dify(ディファイ)って?
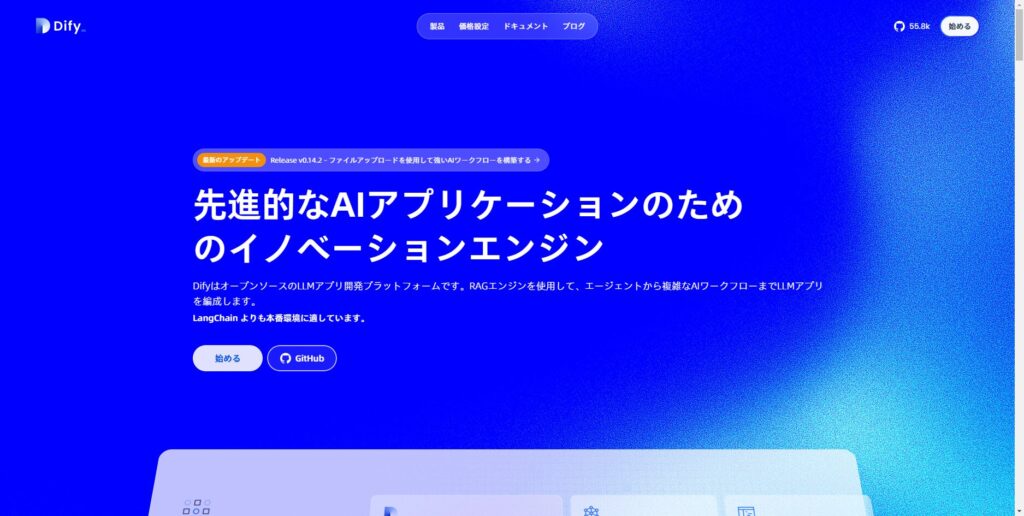
Difyとは、大規模言語モデルを用いて、AI機能を持ったアプリをプログラミング不要で開発できるツールです。 特定のタスクや目的を達成するために動作するAIエージェントや、複雑な処理を行うAIモデルなどをノーコードで作れます。
だれでもAIツール、AIエージェントを作れるというのが大きな魅力。専門的な知識を持つAIエンジニアがいなくても、用途に応じたさまざまな生成AIアプリを作れてしまうんです。
Slack×Dify連携において必要なモノ
- Google アカウント
- Slack ワークスペースの管理者権限
- Difyアカウント
DifyとSlackを連携させる手順
Google Apps Scriptのプロジェクト作成
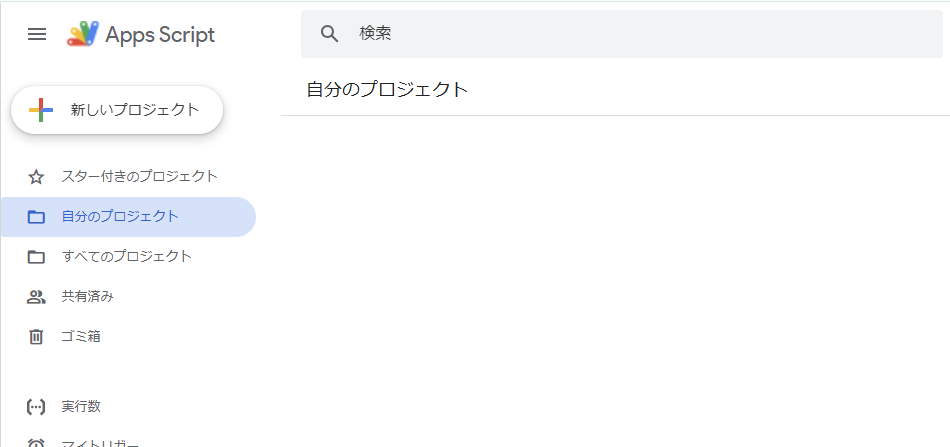
Google Apps Script(GAS)にアクセスしましょう。「新しいプロジェクト」をクリックして作成。
エディタが表示されるので、もとからあるコードを削除して以下のコードを貼り付けてください。
クリックしてコードを表示
//----------
// 定数
//----------
const DIFY_API_ENDPOINT = 'https://api.dify.ai/v1/chat-messages';
const SLACK_API_BASE = 'https://slack.com/api';

//----------
// イベントの重複の対処
//----------
function isEventProcessed(eventId, eventTime) {
  const cache = CacheService.getScriptCache();
  const key = `processed_event_${eventId}`;

  // イベントが既に処理済みか確認
  if (cache.get(key)) {
    console.log(`重複イベント検出: ${eventId}`);
    return true;
  }

  // 古すぎるイベントはスキップ(3分以上前のイベント)
  const currentTime = Math.floor(Date.now() / 1000);
  if (currentTime - eventTime > 180) {
    console.log(`古いイベントをスキップ: ${eventId}`);
    return true;
  }

  // イベントを処理済みとしてマーク(10分間保持)
  cache.put(key, 'true', 600);
  return false;
}

//----------
// Difyの統合
//----------
function callDifyAPI(userMessage, slackUserId) {
  const apiKey = PropertiesService.getScriptProperties().getProperty('DIFY_API_KEY');
  if (!apiKey) {
    throw new Error('Dify APIキーがスクリプトプロパティに設定されていません');
  }

  const options = {
    method: 'post',
    headers: {
      Authorization: `Bearer ${apiKey}`,
      'Content-Type': 'application/json'
    },
    payload: JSON.stringify({
      inputs: {},
      query: userMessage,
      user: slackUserId,
      response_mode: 'blocking',
      conversation_id: null
    }),
    muteHttpExceptions: true
  };

  try {
    const response = UrlFetchApp.fetch(DIFY_API_ENDPOINT, options);
    const responseData = JSON.parse(response.getContentText());

    if (response.getResponseCode() !== 200) {
      console.error('Dify APIエラー:', responseData);
      throw new Error(`Dify APIからエラーが返されました: ${response.getResponseCode()}`);
    }

    return responseData.answer;
  } catch (error) {
    console.error('Dify API呼び出しエラー:', error);
    throw error;
  }
}

//----------
// イベントハンドラー
//----------
function doPost(e) {
  try {
    console.log('受信したイベント:', e.postData.contents);
    const data = JSON.parse(e.postData.contents);

    // URL検証リクエストへの対応
    if (data.type === 'url_verification') {
      return ContentService.createTextOutput(data.challenge);
    }

    // イベントの処理
    if (data.event && data.event_id) {
      if (isEventProcessed(data.event_id, data.event_time)) {
        return ContentService.createTextOutput('duplicate');
      }

      console.log('イベントタイプ:', data.event.type);

      switch (data.event.type) {
        case 'app_mention':
          handleMention(data.event);
          break;
        case 'message':
          if (data.event.channel_type === 'im') {
            handleDirectMessage(data.event);
          }
          break;
      }
    }

    return ContentService.createTextOutput('ok');
  } catch (error) {
    console.error('doPostでエラーが発生:', error);
    return ContentService.createTextOutput('error');
  }
}

function handleMention(event) {
  try {
    if (event.bot_id || event.subtype === 'bot_message') {
      return;
    }

    const userMessage = event.text.replace(/<@[A-Z0-9]+>/g, '').trim();
    const difyResponse = callDifyAPI(userMessage, event.user);

    const message = {
      channel: event.channel,
      text: difyResponse,
      thread_ts: event.thread_ts || event.ts
    };

    sendSlackMessage(message);
    console.log('メンションに応答しました (Dify統合)');
  } catch (error) {
    console.error('メンション処理でエラーが発生:', error);
    const errorMessage = {
      channel: event.channel,
      text: "申し訳ありません。現在応答に問題が発生しています。しばらく経ってから再度お試しください。",
      thread_ts: event.thread_ts || event.ts
    };
    sendSlackMessage(errorMessage);
  }
}

function handleDirectMessage(event) {
  try {
    if (event.bot_id || event.subtype === 'bot_message') {
      return;
    }

    const difyResponse = callDifyAPI(event.text, event.user);

    const message = {
      channel: event.channel,
      text: difyResponse,
      thread_ts: event.thread_ts || event.ts
    };

    sendSlackMessage(message);
    console.log('ダイレクトメッセージに応答しました (Dify統合)');
  } catch (error) {
    console.error('DM処理でエラーが発生:', error);
    const errorMessage = {
      channel: event.channel,
      text: "申し訳ありません。現在応答に問題が発生しています。しばらく経ってから再度お試しください。",
      thread_ts: event.thread_ts || event.ts
    };
    sendSlackMessage(errorMessage);
  }
}

function sendSlackMessage(message) {
  const token = PropertiesService.getScriptProperties().getProperty('SLACK_BOT_TOKEN');
  const options = {
    method: 'post',
    headers: {
      Authorization: `Bearer ${token}`,
      'Content-Type': 'application/json'
    },
    payload: JSON.stringify(message),
    muteHttpExceptions: true
  };

  try {
    const response = UrlFetchApp.fetch(`${SLACK_API_BASE}/chat.postMessage`, options);
    const responseData = JSON.parse(response.getContentText());
    console.log('メッセージ送信結果:', JSON.stringify(responseData));

    if (!responseData.ok) {
      throw new Error(`Slack APIエラー: ${responseData.error}`);
    }
  } catch (error) {
    console.error('メッセージ送信でエラーが発生:', error);
    throw error;
  }
}特に編集とかしなくてよいので、デプロイ → 新しいデプロイ → ウェブアプリの順にクリック。
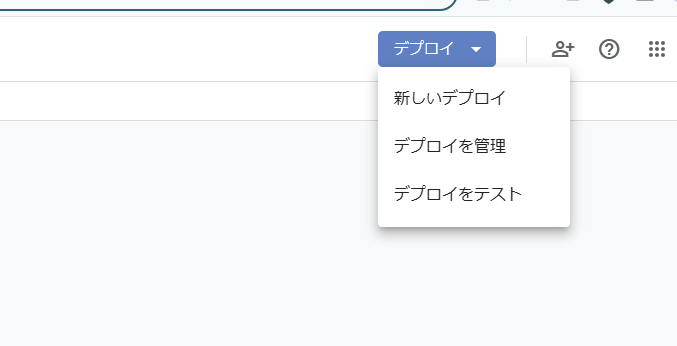
また、以下の感じで設定してください。
- 説明: 任意のものを記入してください(空欄でもOK)
- 次のユーザーとして実行: 「自分」
- アクセスできるユーザー: 「全員」
あとはアクセス承認の確認が来るので「承認」を押しましょう。ウェブアプリのURLをどこかにコピーしておいてください。
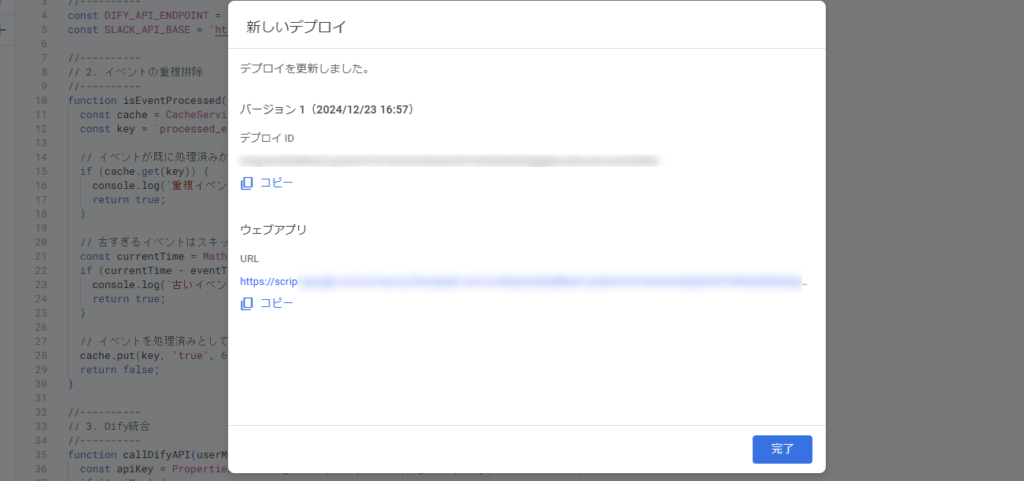
Slackの連携
slack apiにアクセス。Create an appからFrom a manifestを選んでください。
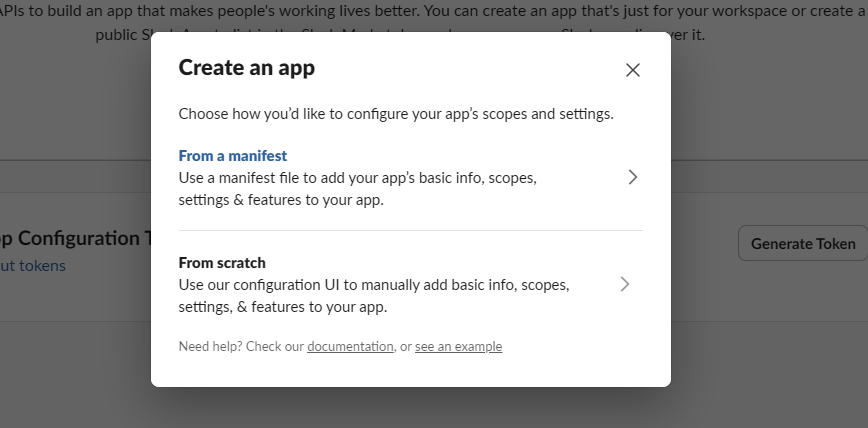
どのワークスペースにアプリをインストールするか聞かれるので、任意のワークスペースで。
その次はJSONタイプを選び、以下のコードをペーストします。、
クリックしてコードを表示
{
“display_information”: {
“name”: “Slack App上で表示される名前”,
“description”: “Slack App上で表示される説明”,
“background_color”: “#000000”
},
“features”: {
“bot_user”: {
“display_name”: “Slackで表示されるアプリ名”,
“always_online”: true
},
“app_home”: {
“home_tab_enabled”: true,
“messages_tab_enabled”: true,
“messages_tab_read_only_enabled”: false
}
},
“oauth_config”: {
“scopes”: {
“bot”: [
“app_mentions:read”,
“channels:history”,
“channels:read”,
“chat:write”,
“im:history”,
“im:read”,
“im:write”,
“reactions:read”,
“reactions:write”,
“team:read”,
“users:read”,
“users:read.email”,
“channels:join”
]
}
},
“settings”: {
“event_subscriptions”: {
“request_url”: “YOUR_GAS_WEBAPP_URL”,
“bot_events”: [
“app_mention”,
“message.channels”,
“message.im”,
“reaction_added”,
“reaction_removed”
]
},
“interactivity”: {
“is_enabled”: true,
“request_url”: “YOUR_GAS_WEBAPP_URL”
},
“org_deploy_enabled”: false,
“socket_mode_enabled”: false,
“token_rotation_enabled”: false
}
}
「Slack App上で表示される名前」「Slack App上で表示される説明」は任意のものを入力してください。
「Slackで表示されるアプリ名」も任意で構いませんが、英語で入力しましょう。「YOUR_GAS_WEBAPP_URL」には、先ほど取得したウェブアプリのURLを入力。
ダブルクォーテーション(””)の間に入力することを忘れずに。
URLを確認してください~見たいなエラーが出る場合がありますが、その場合「URLを確認する」みたいな箇所をクリックすると治るかと思います。
それでも治らない場合は、GASのデプロイの設定でアクセスできるユーザーの設定が「全員」になっていることを確認してください。筆者はこの辺りで詰まりました。
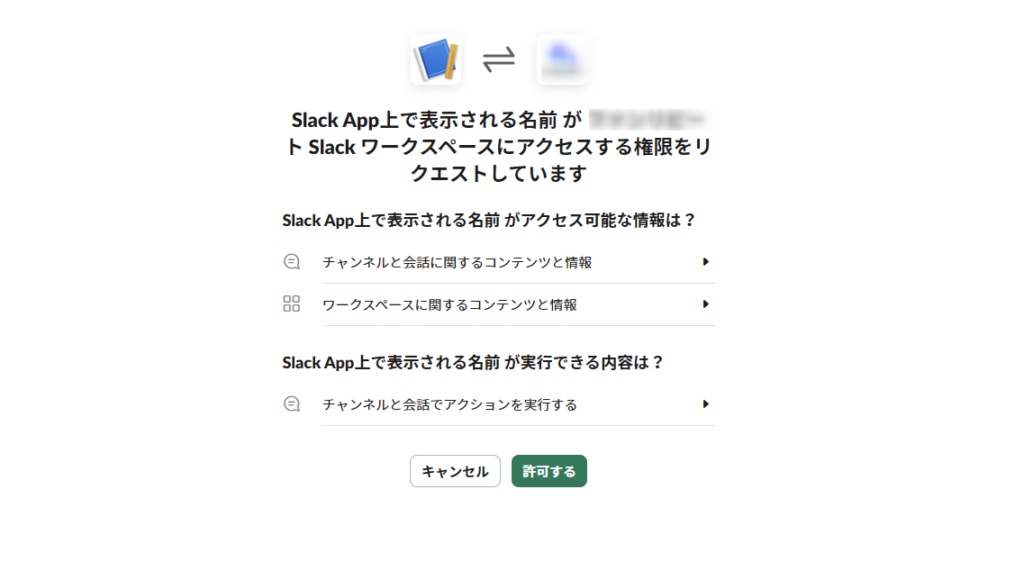
次はOAuth & Permissionsを選択し、「Install to ワークスペース名」をクリック。
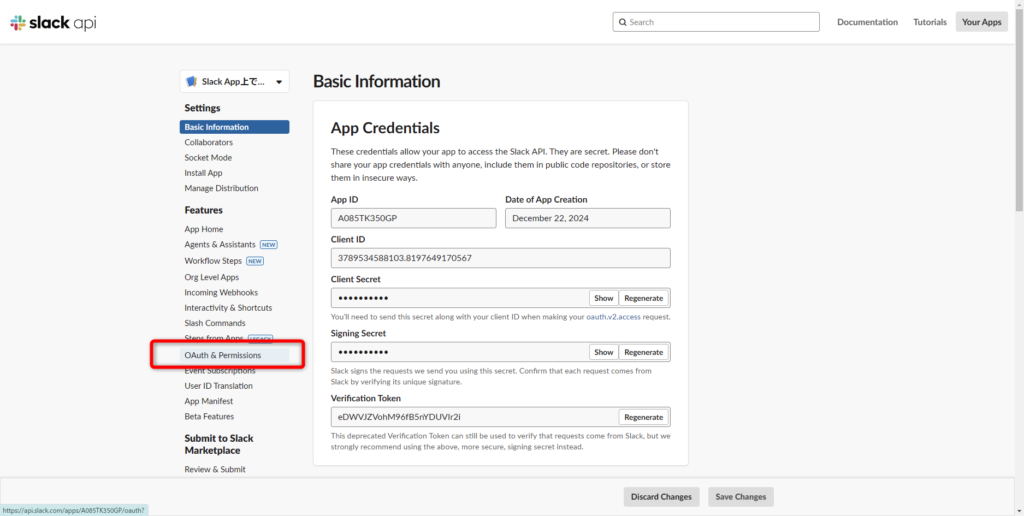
許可するか?と聞かれるので許可してください。
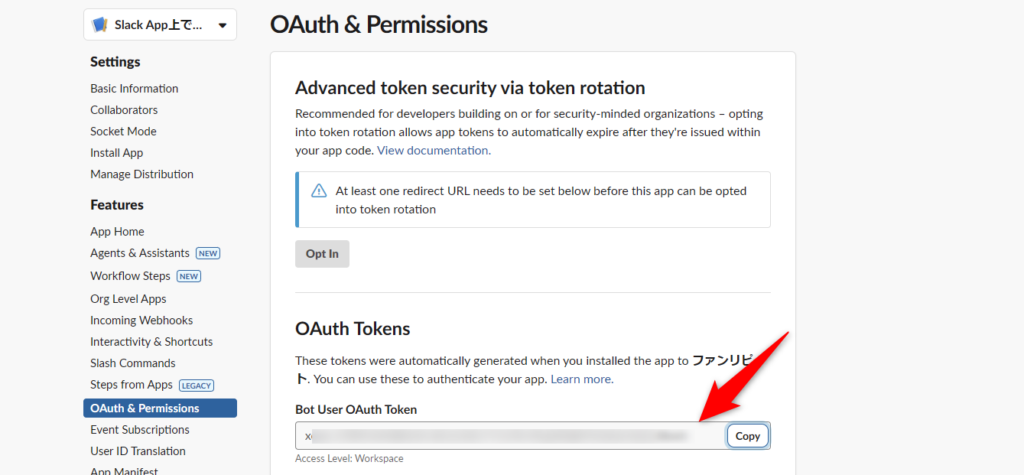
Bot User OAuth Tokensの値をコピーして控えておきましょう。
Dify側の設定
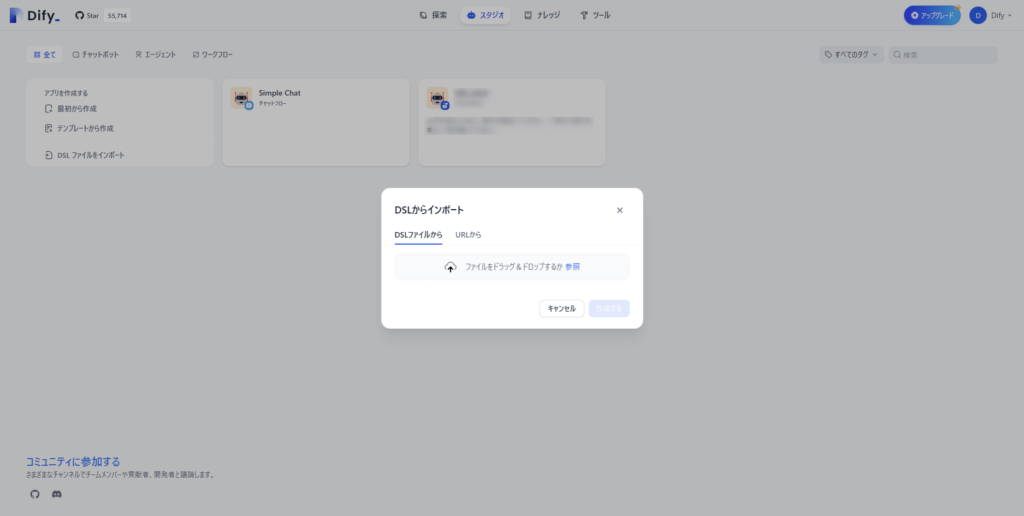
Difyのダッシュボードにログインし、アプリケーションを新規作成します。作成する際は、DSLからインポートを選択。以下のファイルをドラッグしてください。
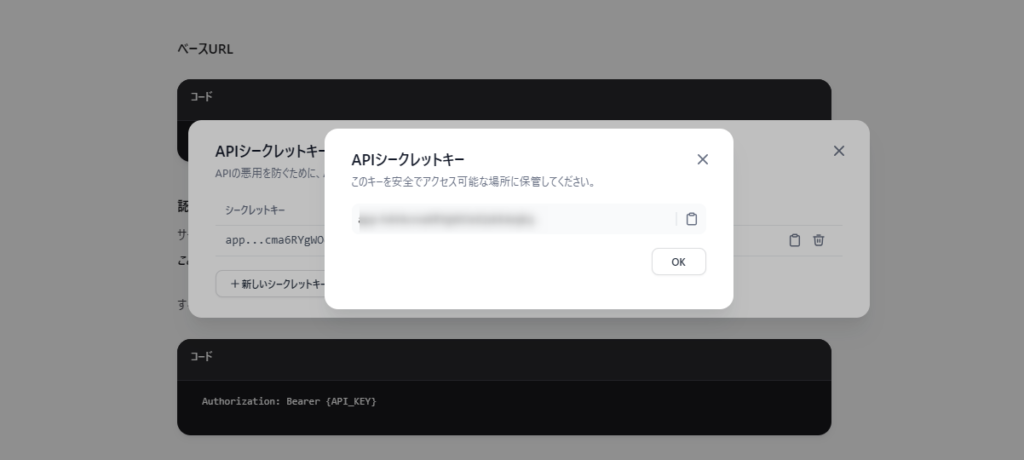
APIアクセス → 右上にある「APIキー」に行き、新しいシークレットキーを作成を押します。すると、以下のようにAPIキーが発行されるのでこれも控えておきましょう。
GASの設定
GASに戻り、プロジェクトの設定から「スクリプトプロパティの設定」に行きます。
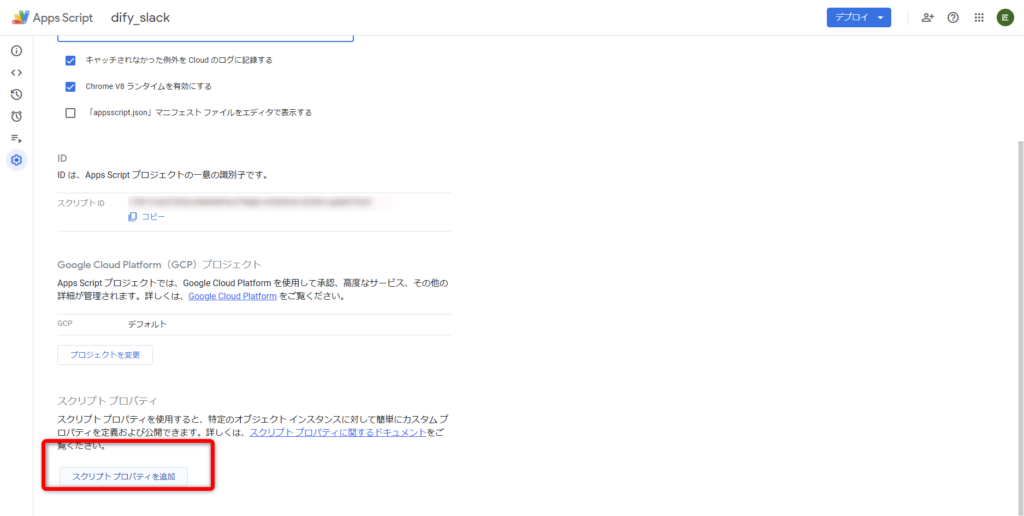
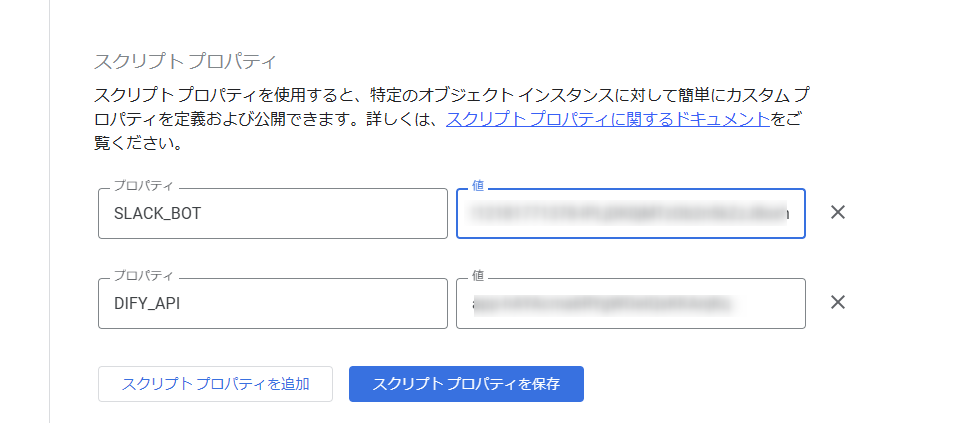
- プロパティ名: SLACK_BOT_TOKEN
- 値: xoxb-… (控えたBot User OAuth Token)
- プロパティ名: DIFY_API_KEY
- 値: (控えたDifyのAPIキー)
こんな感じで設定してください。
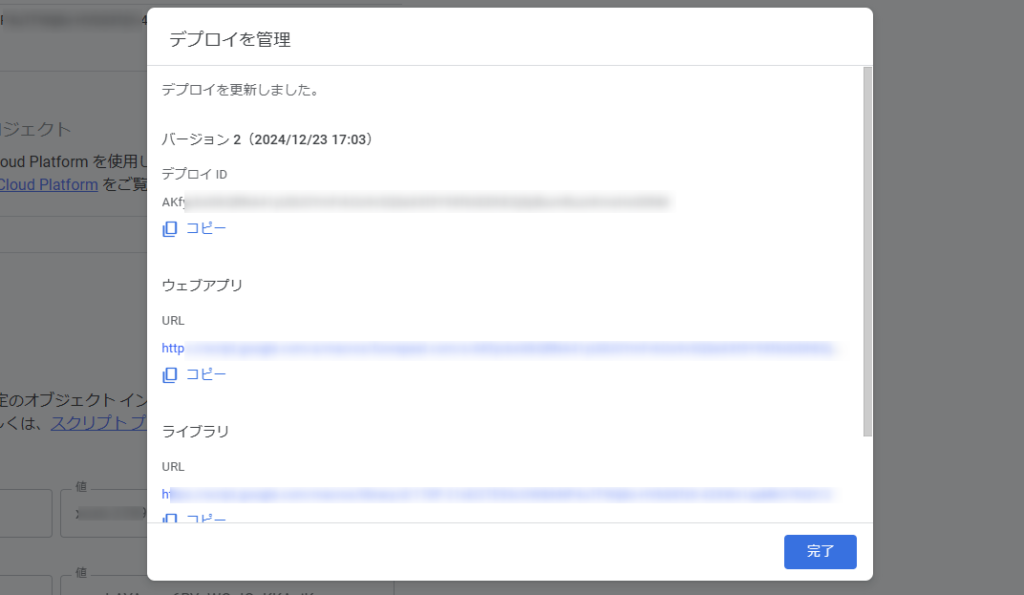
最後にデプロイを新バージョンに更新して終わりです。
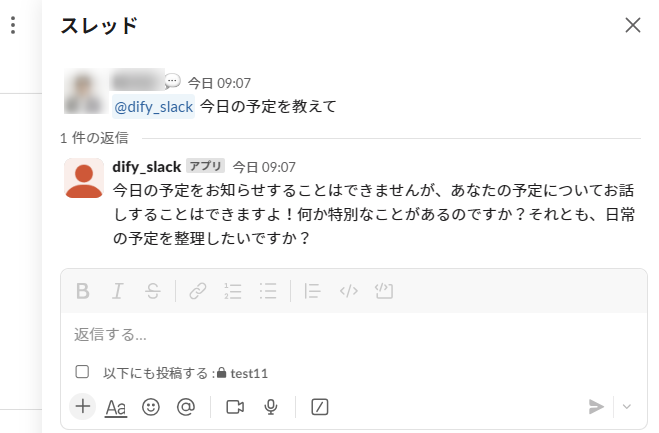
適当にslack内でスレッドを作り「/Invite @dify_slack」で呼び出してみましょう。エラーがなければこんな感じで返してくれます。
まとめ
今回はSlack×Difyでの簡易的なチャットボットを作成してみました。
ここからの発展としては、Difyで議事録を学習したチャットボットを作成して、Slackのチャンネル内に入れる…なんてことも可能です。どんどんAI技術が発展する昨今、AI活用の波に乗り遅れないようにしたいですね。
弊社ではAI関連のシステム・アプリ開発を支援しており、過去に開発したサービスだとChatGPTを活用したAI英会話アプリがあります。AI活用セミナーも積極的に登壇しているので、AIを使って何かしらのサービスが作りたい!という方はぜひご相談ください。
🕒 「生成AIお悩み相談室」30分無料相談のご案内
\今だけの特別枠、予約殺到中!/
「生成AIを導入したいけど何から始めれば?」「ChatGPTをビジネスに活用する方法は?」「コスト削減のためのAI活用法を知りたい」
このような疑問や課題をお持ちではありませんか?
当社の生成AIスペシャリストが、あなたのビジネス課題に合わせた具体的なアドバイスを完全無料で提供します。
✅ 30分で得られる価値
- 貴社の業務に最適な生成AI活用法の提案
- コスト削減・業務効率化のための具体的なステップ
- 競合他社に差をつけるAI戦略のヒント
- 内製化に向けたロードマップの相談
✅ 参加者からの声
「相談後すぐに実践できるアイデアが得られました」
「具体的な導入ステップが明確になり、迷いがなくなりました」
【完全無料・30分枠】数に限りがございますので、お早めにご予約ください。
👉 今すぐ無料相談を予約する 👈
※予約は先着順・毎月限定5枠のみ。キャンセル待ちにならないようお早めに。

